Saturday, July 7, 2012

A Bird in the Bush

Pin It

I just love our A La Carte range.  They are just perfect for those who are new to stamping & don’t want to invest to much until they become addicted (as we know they will!)  One of my favourites is Young Vermillion.

2012-02-22 001 002

I stamped the bird on watercolour paper & then used an assortment of reds, oranges & yellow Stampin’ Write Markers to add depth to the colour of the bird.  I then used an aquapainter to add a wash of Baja Breeze to the background. 
Light bulbTo make the mini flowers use a bone folder to “break” the paper fibres by pulling the paper against the bone folder. 
  • Do this a few times on both sides until the paper is soft. 
  • Now peel apart the paper so you have 2 layers that will feel a bit like suede on one side.
  • Punch out the flowers using the flower from the Itty Bitty Shapes Punch Pack.
  • Place flowers on a sheet of foam & use a bone folder in the centre of each to make a hollow
  • Use a Blender Pen & ink of your choice to add colour to the flower centre, then add a pearl.
I used DSP from the Neutrals Paper Stack for the background.  This was run through the Big
Shot
using the Square Lattice Embossing Folder which has made the paper look like it is two-toned.
Happy Stamping
Ann
Pin It

Tuesday, July 3, 2012

All That Glitters is Not Silver!

Pin It

2012-05-10 005 006

I just love our Glimmer Paper, it allows you to add glitter to a project with none of the mess!  At only $10.95 for 2 12” x 12” sheets, it is great value too.  It is available in red & silver, but what if you would like a different colour?

Easy!  You just colour it yourself.  After much trial & error & many psychedelic results, I have found the best method is to use a combination of isopropyl alcohol (no, don’t drink it) & re-inkers.  I used some empty, divided Stack & Store containers.  Add a few drops of alcohol to each quarter then add a few drops of re-inkers of your chosen colours to each one.  You can vary the intensity of the colour by the amount of re-inker you add.  I then used an Aquapainter to “spread” the colour over the butterfly.

You can use water instead of alcohol but it will take longer to dry.  You can also add some alcohol straight into your Aquapainter & then pick up ink from the lid of your ink pad.  Note that in all methods, the colour will lighten as it dries.

I used the Crop-a-dile to punch out the holes in the wings of the butterfly & then “recycled” them to make the “flight path” & for the final bit of bling, I added a Neutral Glimmer Brad.

Happy Stamping

Ann

Pin It

Sunday, October 9, 2011

All Stitched Up

Pin It

I am by no means a sewer, in fact the only thing I have sewed in the last 20 years is a teddy bear, so I am quite pleased with my completed stocking!

I just love Stampin’ Up!s new fabric range.  The pattern for this stocking comes with the Deck the Halls Fabric Pack.  It was so simple & is even fully lined.  I do need to put one more brad on the band at the top as I ran out.  I did change a couple of things from the original pattern.  I layered Cherry Cobbler Seam Binding Ribbon under the Victoria Lace Crochet Trim. 

For the heal & toe of the stocking, The 2 different fabrics are cut out on the Big Shot using the Top Note Die.  I thought I might have a bit of trouble sewing around those edges so before I cut them out, I ironed some of the Big Shot Adhesive Roll onto the back of each piece of fabric & then ironed them onto the stocking.  I must say the adhesive roll is fantastic!  It sticks way better than any other ones I have tried & certainly makes crafting easier.

P1010720

Now I just have to hope that Santa has lots of goodies to fill it up for me!

Happy Stamping

Ann

Pin It

Monday, October 3, 2011

Stocking Spectacular

Pin It


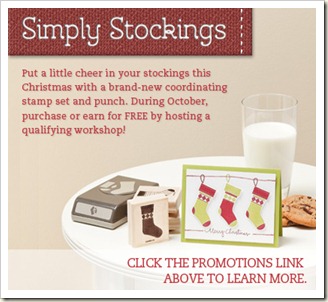
What an awesome special we have for this month!  Host a workshop with a minimum of $500 sales & not only will you be able to choose at least $70 in Free Product, but you will also receive the Build-a-Stocking bundle for Free!

Click on the Picture below to see the stamp set & punch.  You can choose either clear or wood mount.  The bundle is valued at over $100!

SP_DBWS_Ad_Oct2011

Now, you may be thinking, very nice, but what do I do with it for the rest of the year?  The answer is use your imagination.  I had a little play last night & came up with the following cards.

P1010726

This was my first attempt using the Build-a-Stocking set to make a baby card.  I thought the booties looked a bit long so I have shortened them for the baby boy card.

P1010727

Now for a bit more fun – I love punch art & I had seen a few cards where the stocking punch has been used to use a hobby horse.  I haven’t tried that yet, but here is what I came up with last night.

P1010725

Off to play again now.

Happy Stamping

Ann

Pin It

Thursday, September 8, 2011

New In-Colours

Pin It
Along with our new Idea Book & Catalogue, we have five fantastic new In-Colours.  Last years In-Colours will remain with us for another year & this years will be available for two years.

I made these cute little bird houses featuring the new In-Colours using the Milk Carton Die & the Big Shot for my catalogue launch party.


From left to right the colours are:
Island Indigo
Calypso Coral
Pool Party
Wisteria Wonder
lucky limeade

Of course these colours look much better int "real life", so if you haven't seen them yet, contact me to book a time to view them.
Pin It

Super Starter Promotion!

Pin It
Click on the Specials link at the top of this page to discover the amazing Starter Kit Offers Stampin' Up! has for September!
Take advantage of the $189 Mini Starter Kit or get 20% offf the full kit!
Pin It

Click Below To Contact Me